


Picture this, you wake up to retrieve your morning cup of Joe only to find your home has been invaded like the beaches at Normandy. Your first thought is to counter act this ant invasion with an assault of your own but taking on this enemy without the proper plan could leave you waving the white flag.
Have no fear, you have the top General on your side with HowToPest.com. Let’s get started!
General Sun Tzu said; “Know thy enemy and know yourself, in a hundred battles, you will never be defeated.”
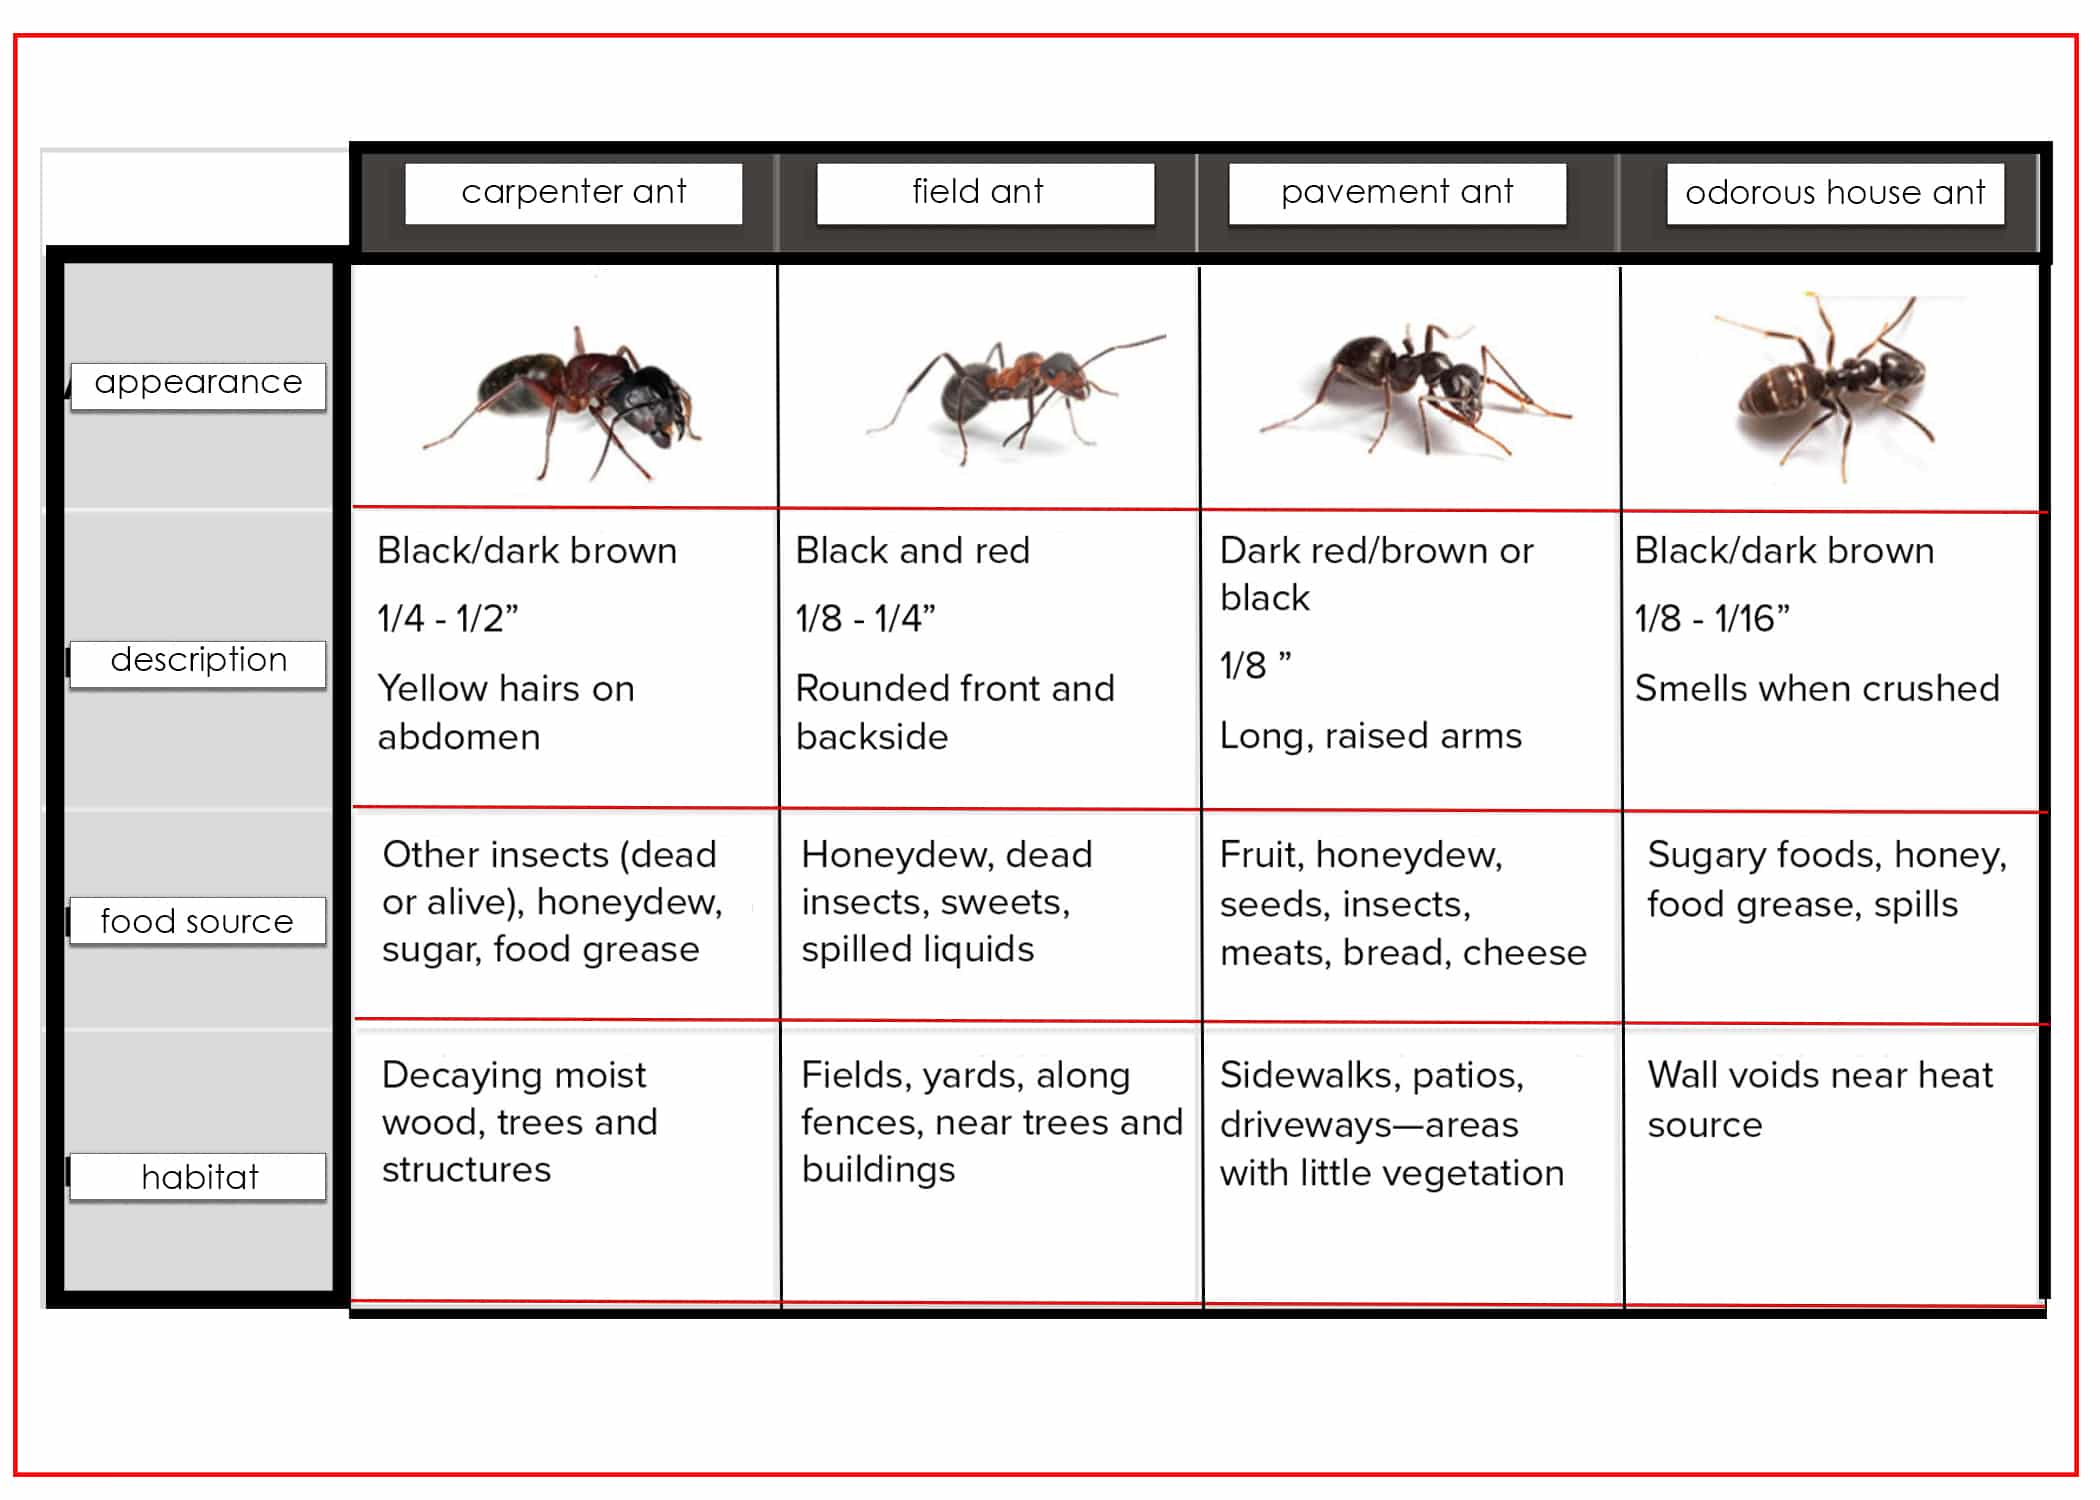
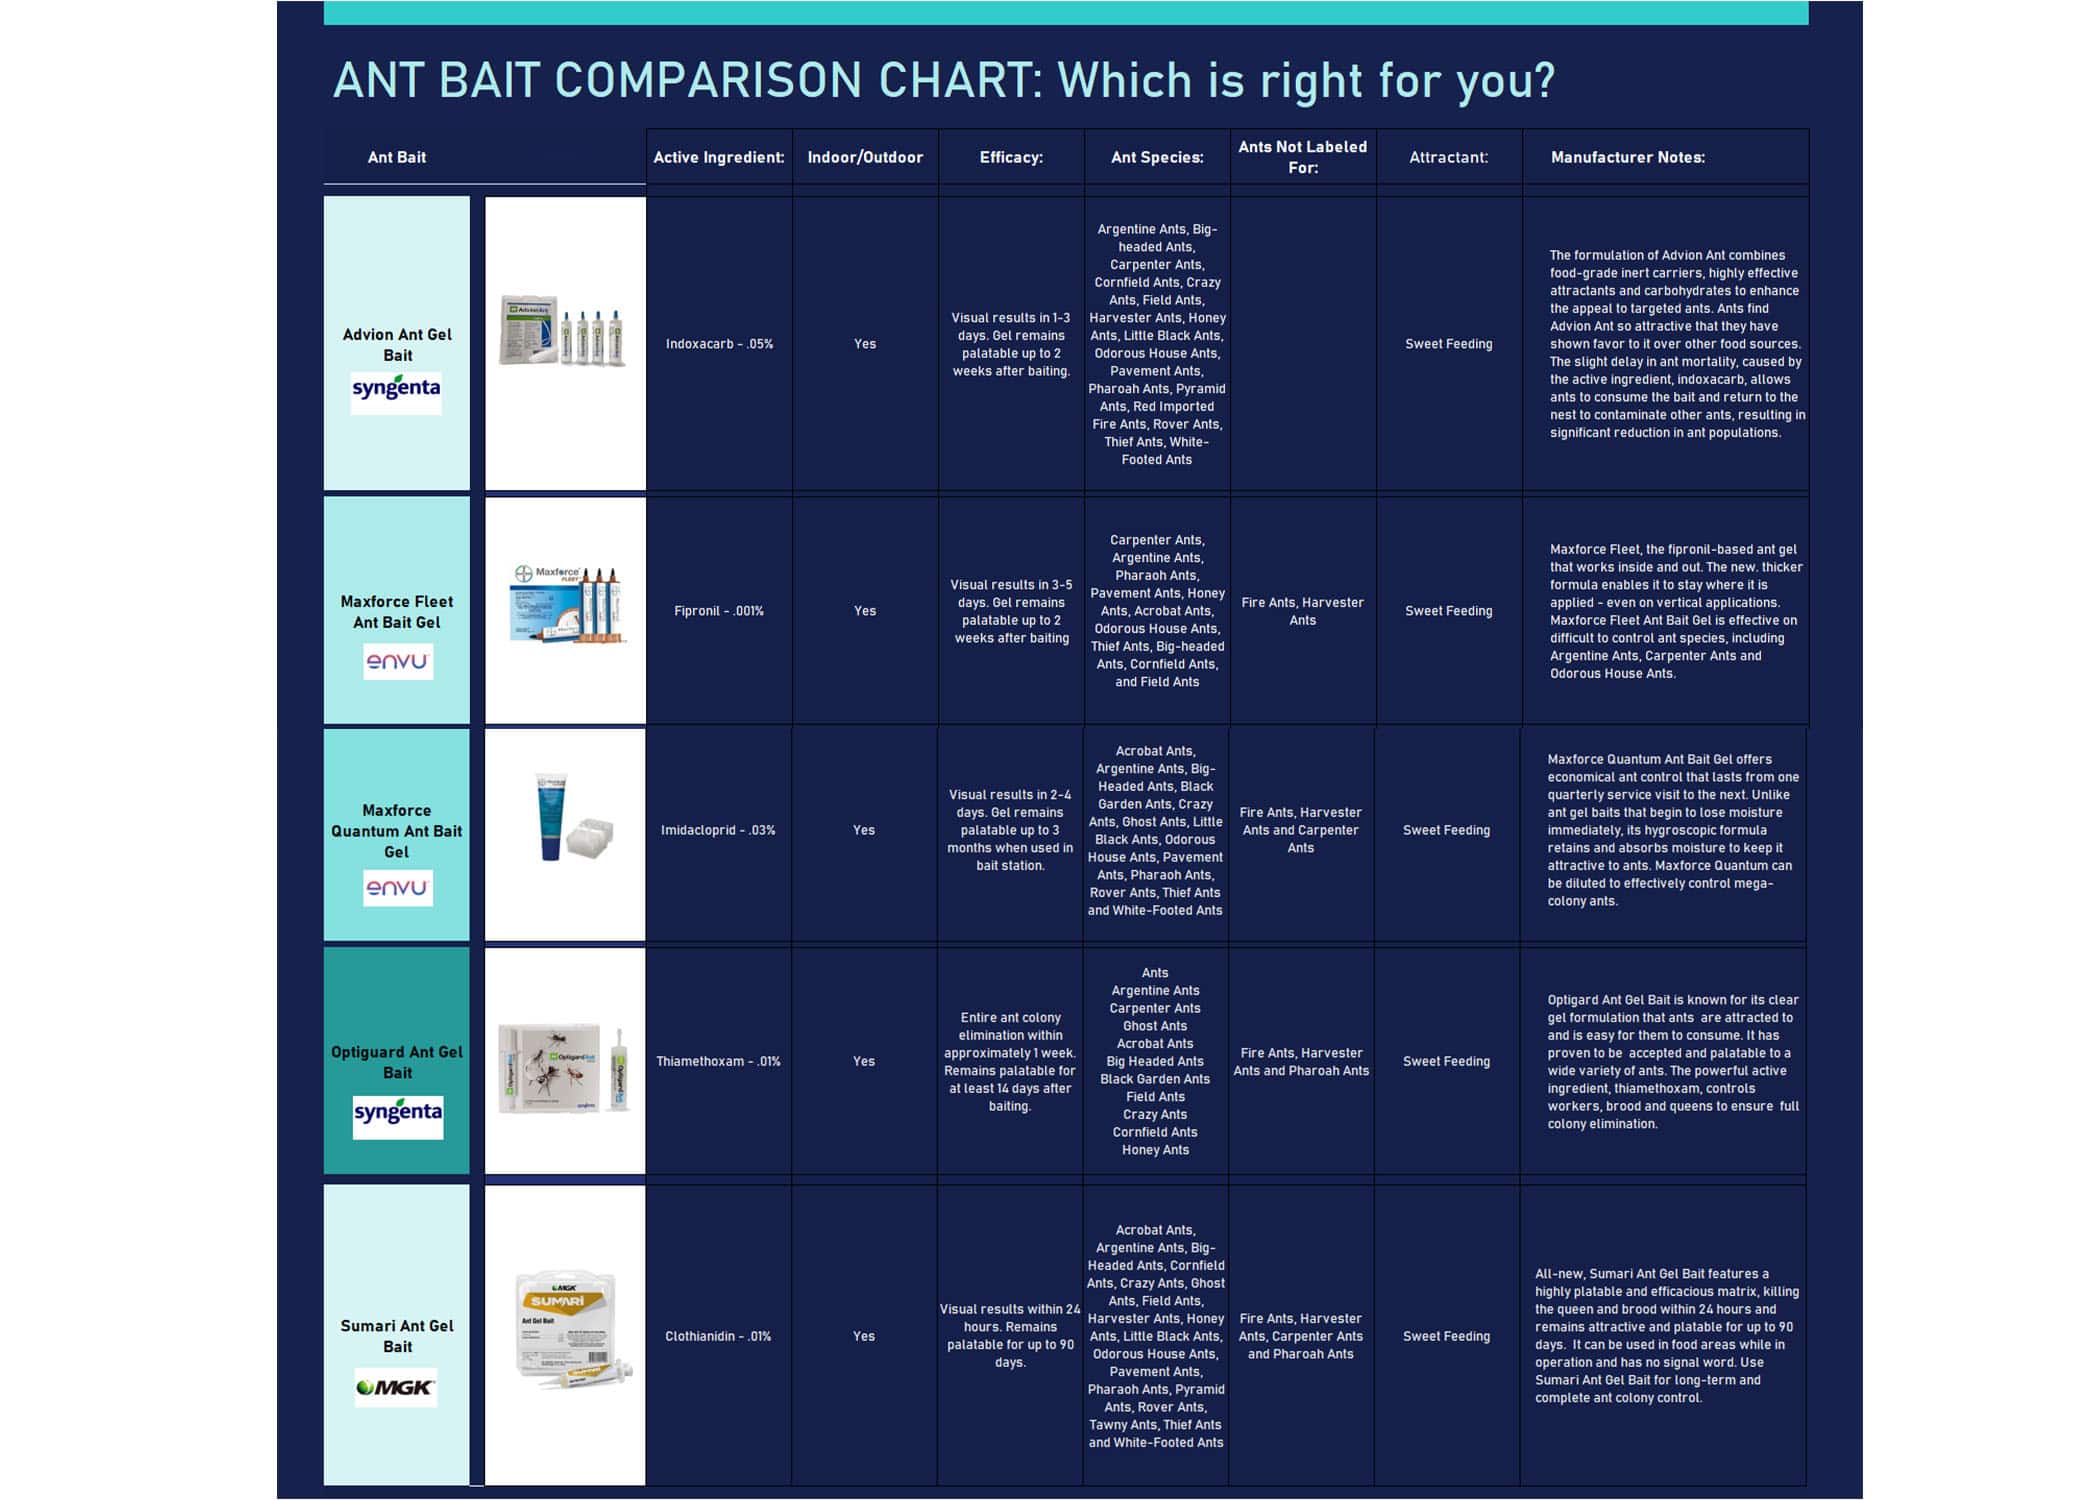
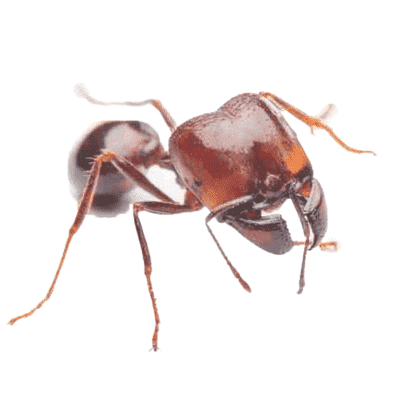
Identification is key to a successful ant control program. Is it the Pharoah ant, Carpenter ant, Odorous ant or Argentine ant that is invading? Remember these words: ant bait is your best friend. Weapons like Advion Ant Gel Bait, Maxforce Ant Bait Stations or Advance 375A Granular Ant Bait can be invaluable in your war.
Side note, for Carpenter ants, Delta Dust is also a great option.
You now have your enemy insight; it is time to act but remember that even the best weapon used incorrectly will be ineffective. Pesticide baits are essentially food, so imagine that someone sprayed window cleaner on your delicious plate of spaghetti, you would definitely not eat it. Well, if you apply an ant bait then spray another pesticide over the bait, the ants will look at it like it’s a plate of brussel sprouts with black licorice sauce!
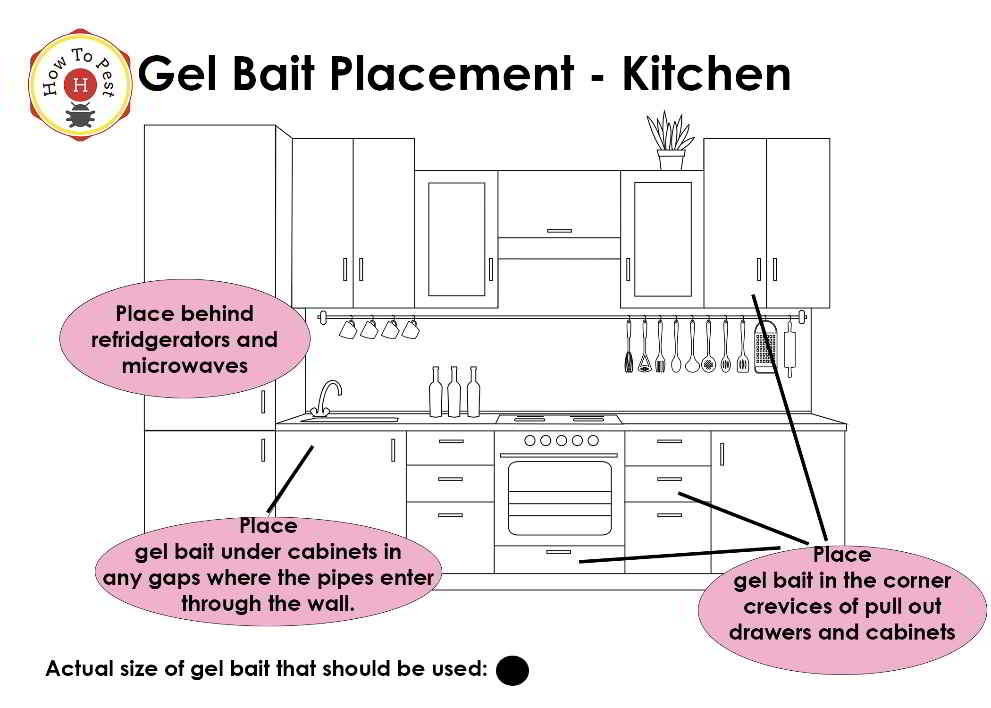
Proper bait placement will save you time and money in the long run! You shouldn’t just place bait anywhere. Here are a couple quick tips for placement:
Place bait within the ant trail or where you are seeing ants
A little goes a long way, only apply a tiny dot of bait.
Another important note to mention is that ant gel baits in general are not a quick fix or knockdown. You may not win the immediate battle, but you will win the war! The foraging ants will pick up the bait and then bring it back to the nest where the ants will all share, thus destroying the colony.
What’s the difference? Repellant pesticides like Talstar P and Suspend SC are pesticides that can be detected by the target pest. Repellant pesticides are great for outdoor perimeter treatments, they repel the pest away from your home. Most of your drug stores or home stores carry nonprofessional grade repellant pesticides. Non-repellant pesticides like Alpine WSG or Temprid FX are not detectable by the target pest. These pesticides can be applied before using baits for the quick knockdown that you desire. Always make sure that the non-repellant pesticide has been given adequate time to dry before placing your ant bait.
*Never mix a non-repellant pesticide in a pesticide sprayer that has had repellant pesticide in it unless it has been properly rinsed.
Ant identification is key
Proper bait placement will save you time and money
Non-repellants can be used in conjunction with pesticide baits as long as the non-repellant has been applied prior to baiting and allowed to dry.
Be patient and you will win the war against those pesky ants
Outdoor Ants:
Proper prevention and treatment of outdoor ants can ensure that you are not fighting an ant battle indoors. You can make your life a whole lot easier by preventing an ant infestation before it starts by following some simple steps:
Remove any lawn debris (wood piles, leaf piles)
Keep trash in covered trash containers
Cut back any overgrown bushes or tree limbs that touch the house
Seal up any cracks and crevices that can lead into the house
If after all that you still come across some ant invaders, you know HowToPest.com has got your back!
Again, identification is key to a successful outdoor ant control program. Do you have Pharoah ants, Ghost ants, Cornfield ants or maybe Fire ants? With outdoor ants in sight, most of the time you can follow the trails, which can possibly take you right to the nest. It is always a good idea inspect tree trunks and bushes and water lines for ant trails. Locating ground zero can make your job a whole lot easier.
Insecticide concentrates like Bifen XTS, Cyzmic CS or Essentria IC3 (all natural) are a great way to treat larger outdoor areas. Insecticide concentrates are designed to be added to water and sprayed through a pesticide grade sprayer. Always follow the dilution rate instructions and safety instructions on the label. Remember, always keep people and pets away for the treated area until the pesticide has had a chance to dry.
If you are looking to treat your entire lawn for ants, applying a granular bait such as Bifen L/P, Deltagard G or Talstar PL would be a great option for you. Granular baits are easy to apply with a hand or rotary spreader. Granular baits are also a great option for fire ant treatments. Again, always follow the instructions on the label for application rates and placement.
HowToPest.com wants to help you! We have pest control professionals on staff to help you with all your DIY pest control questions. Doing your own pest control does not have to be hard. Chat with us Monday – Friday 8am-6pm PST. If there is a product that you would like that you don’t see on HowToPest.com, please call us at 877-708-1974 and we will do our best to get it for you.
It is definitely a common misconception that you only get bed bugs if you have a dirty home or if you travel to a third world country. Bed bugs do not discriminate! You can get bed bugs by staying in a 5-star hotel, or by sitting in a movie theater, or by buying second-hand furniture or clothing. You can even get bed bugs by taking a bus or flying on an airplane. In reality, the possibilities are endless! If you pick up even 1 bed bug and bring it back to your home, at an egg laying rate of 1-5 eggs per day, within 6 months, you can have a full-blown infestation of thousands of bed bugs! So, now that you know how you can get bed bugs in the first place, you can rest assured that HowToPest.com is going to help you every step of the way to getting rid of these blood-sucking critters!
In our opinion, one of the most difficult bugs to get rid of is bed bugs. Complete bed bug removal will require much effort and diligence, but when done right will give you the peaceful nights rest that you are looking for.
Have no fear, you have HowToPest.com on your side. Let’s get started!
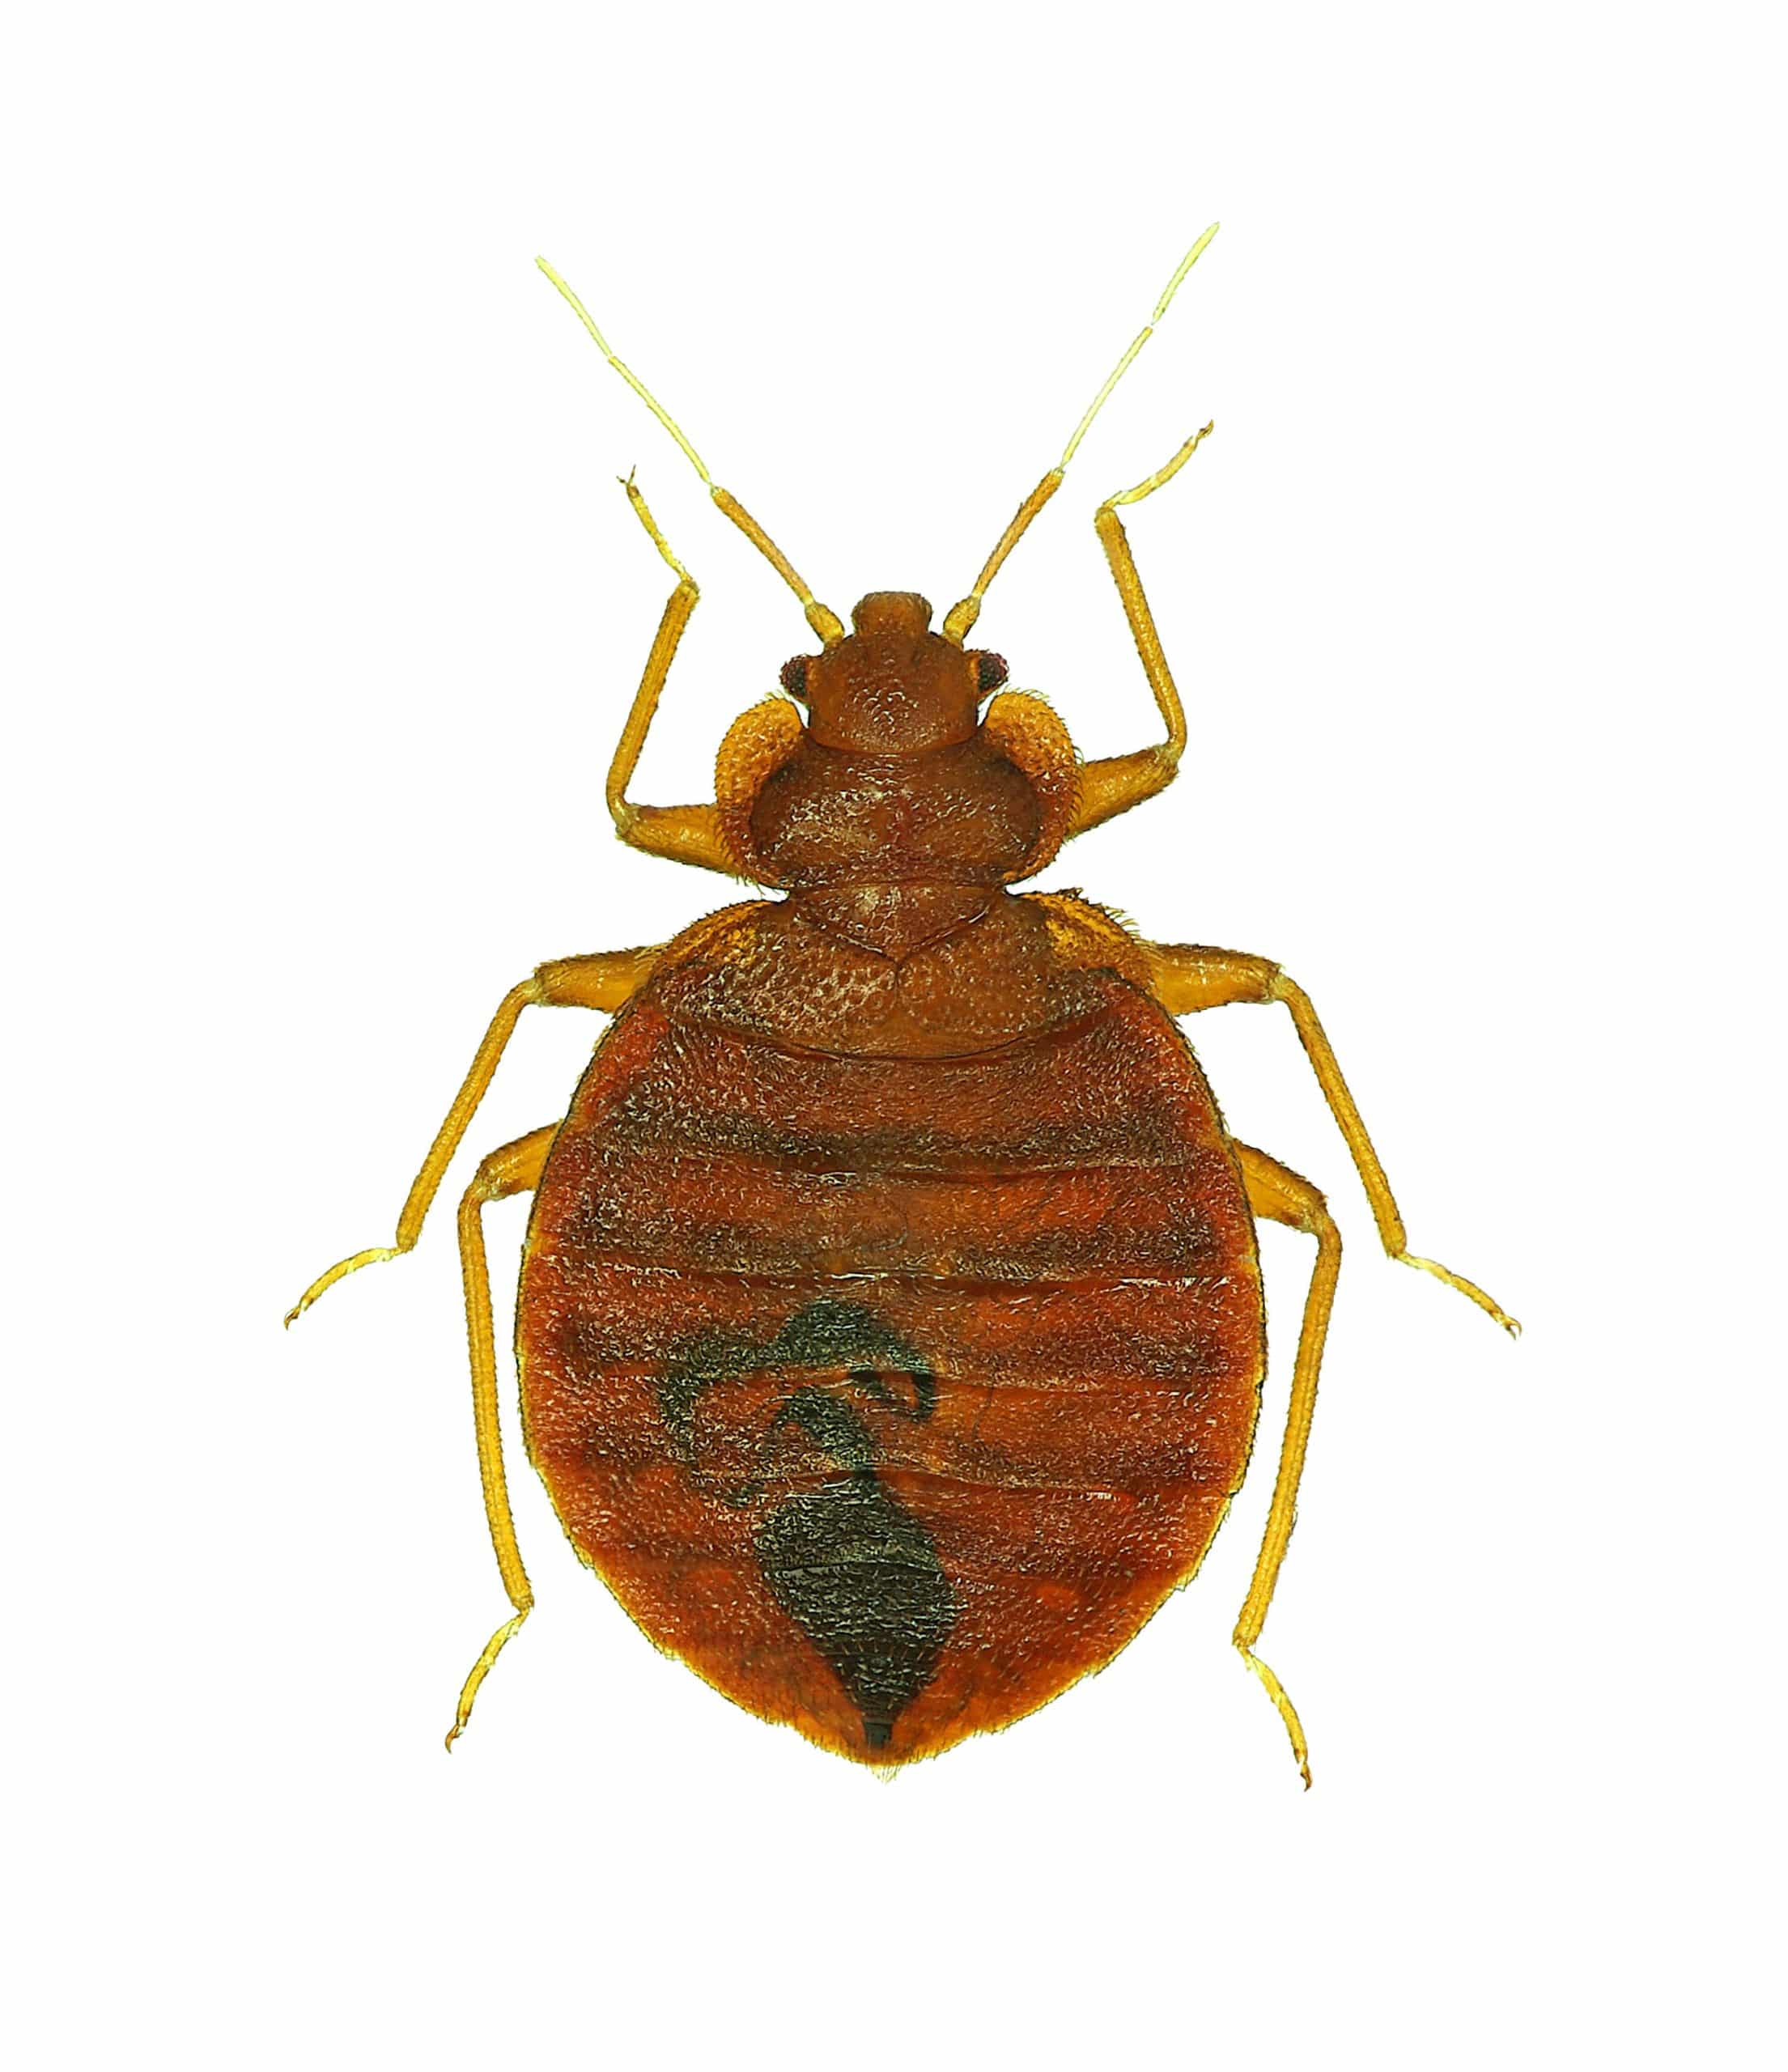
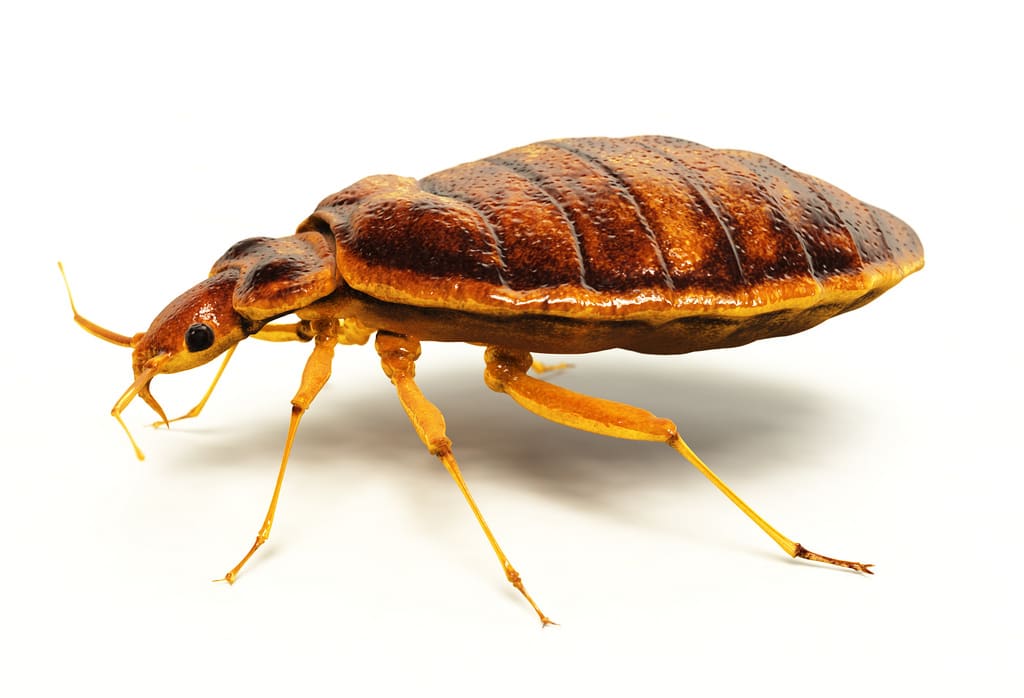
Identification is key to any successful pest control program. When dealing with bed bugs, think of yourself as Inspector Gadget (for all you 80’s kids out there). Your eyes being your #1 gadget. Bed bug bites may not be your only sign of a bed bug infestation. Here are some other signs of a bed bug infestation:
Blood Spatter or Smears – Bed bugs are feasting on their host through-out the night which can leave blood markings on your sheets and mattress.
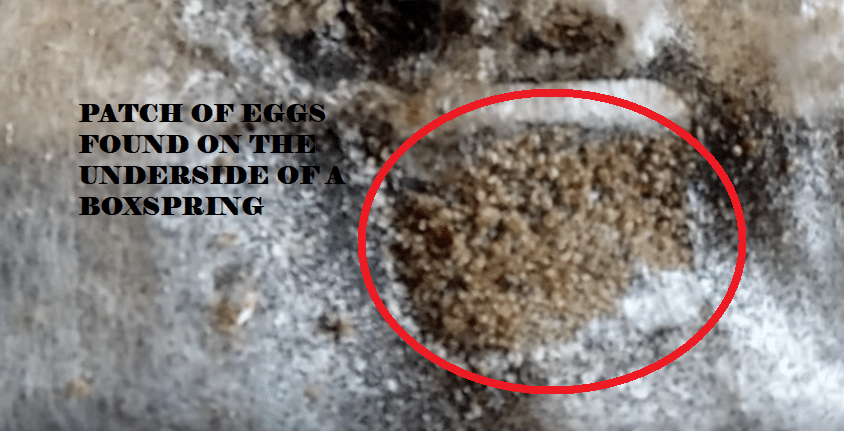
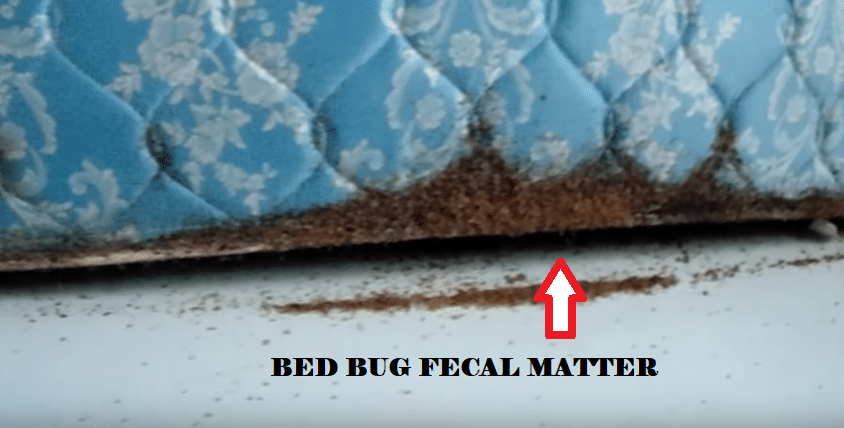
Bed Bug Feces – Bed bug feces can be found by looking at the creases along the mattresses and box springs, headboards and footboards. In some more extreme cases can be found in drawers, outlets, baseboards and picture frames.
Bed Bug Casings – Bed bug casings are the shells of the bed bugs that have been left behind after they have molted. Like bed bug feces, casings can be found by looking at the creases along the mattresses and box springs, headboards and footboards. In some more extreme cases can be found in drawers, outlets, baseboards and picture frames.
*Remember, bed bugs can easily hitch a ride and travel from room to room on you. So, you will definitely want to inspect all rooms to make sure you do a thorough treatment.
Remember these words, thorough, thorough, thorough! You can purchase the best bed bug chemical out there, but if you do not do a thorough treatment you will not solve your bed bug infestation, you will still have bed bugs. See how to do a bed bug inspection on our video tutorials page.
Identifying the severity of your bed bug infestation will determine whether you want to purchase a bed bug aerosol or concentrate. If you are looking to treat a smaller area, you might want to consider a bed bug aerosol like Crossfire Aerosol but if you are looking to treat larger areas then it may be more cost effective to use a concentrate like Crossfire Concentrate, that can be diluted in water and applied with a pesticide grade sprayer.
Mattress/Box Spring Seams
Headboards/Footboards
Screw Holes
Furniture Joints
Bed Posts
Picture Frames
Baseboards
Drawers
Outlets (Dust Only! Never Spray Aerosols or Concentrates In Outlets)
Cushions
By now you are probably “picking up what we are putting down”. Bed bug treatment needs to be thorough! Bed bugs can be anywhere!
Using a chemical dust can be a vital weapon in treating for bed bugs. Chemical dusts like Cimexa Dust or Delta Dust can be used where aerosols and concentrates can’t. For example, chemical dusts can be used in electrical outlets or applied to paintings. When using chemical dusts it is always a good idea to apply the dust with a duster that way you won’t over apply the dust and none will be wasted. A little goes a long way.
*Pro Tip – Place a penny in the duster. This will agitate the dust, helping the dust to float. Apply the dust in small, light puffs.
Once you have completed your first treatment, will need to repeat this same procedure in 7 days to allow for any newly hatched eggs. Again, if you have a higher severity of bed bugs, you may want to do a 3rd treatment 7 days from the previous treatment.
Bed bug treatments take time and effort but you can do it! Being proactive to avoid getting bed bugs is a lot easier.
If you like to go to yard or garage sales, make sure you do a thorough inspection before bringing unknown items into your home.
Treat your luggage with Crossfire or Bedlam to avoid unwanted passengers.
Never put your luggage on the hotel bed, use the luggage rack.
Use a protective mattress and box spring cover.
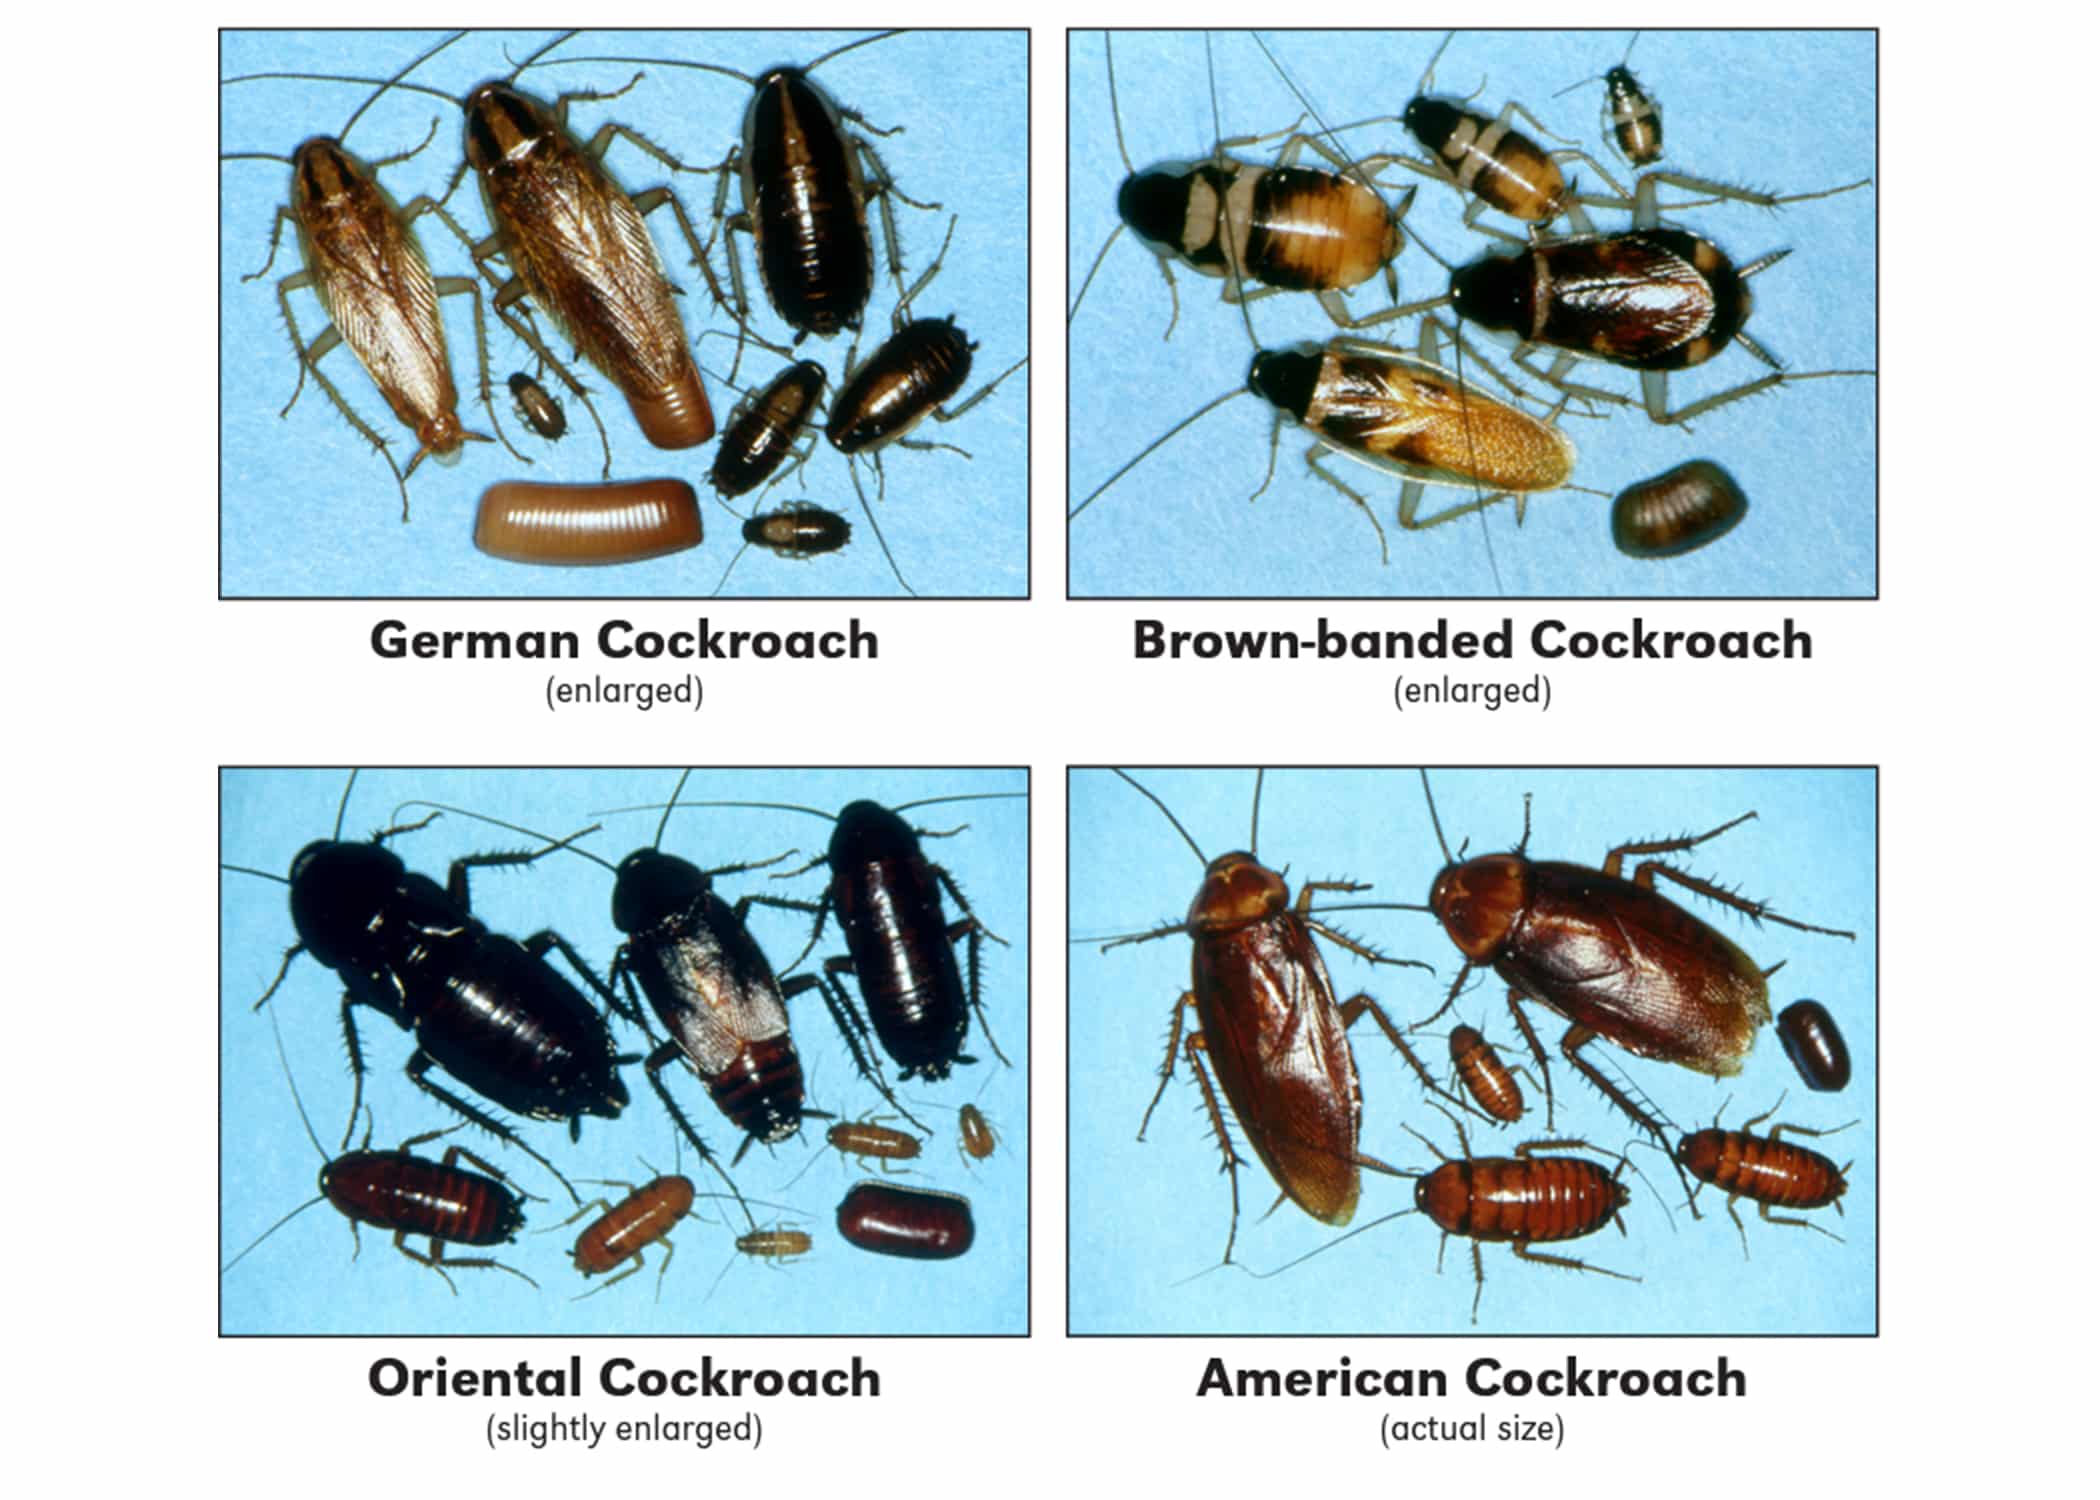
Getting rid of cockroaches like most other bugs can be made a lot simpler by identification. There are many species of cockroaches, 4,500 to be exact but we are just going to deal with the top 3 (German, Oriental, American). The most common cockroach is the German Cockroach. While cockroach identification will be helpful in determining which roach control pesticide to use, the application of the pesticide will be quite similar no matter which roach you are dealing with.
We love cockroach baits, why you ask? Well although cockroach baits are not a quick knockdown per se, they can be a lasting solution to a roach infestation. A great cockroach plan of action would consist of a three-pronged attack including cockroach bait, a non-repellant spray insecticide and an insect growth regulator (IGR). IGR’s are a valuable tool in roach control because they mimic hormones in young insects. They disrupt how cockroaches and other insects grow and reproduce.
Ok so let’s get down to the nitty gritty! If you want to know how to get rid of cockroaches in your home, apartment or office here are the deets:
As always, do a thorough inspection of your home or office, try to find any possible entry points that the cockroaches could be entering from. Popular entry points are from the pipes that lead into your home such as the drain pipes under the sink in the kitchen or bathrooms. You will definitely want to use caulk or foam to seal those areas, closing them off.
Spray treat the interior and exterior perimeter of your home with a mixture of a non-repellant pesticide such as Alpine WSG or Temprid FX and an insect growth regulator (IGR) such as Gentrol.
Once your spray is DRY, (wet spray can contaminate your bait making it undesirable to the roaches) you can then use cockroach bait to deliver the final blow to the roaches. Remember, when baiting a little goes a long way! You will only want to use a tiny dot of roach bait (the size of this letter O).
Finally, using a chemical dust can be used where sprays can’t such as electrical outlets. When using chemical dusts such as Delta Dust or Cimexa, it is always a good idea to apply the dust with a duster that way you won’t over apply the dust and none will be wasted. Again, a little goes a long way.
*Pro Tip – Place a penny in the duster. This will agitate the dust, helping the dust to float. Apply the dust in small, light puffs.
HowToPest.com wants to help you! We have pest control professionals on staff to help you with all your DIY pest control questions. Doing your own pest control does not have to be hard. Chat with us Monday – Friday 8am-6pm PST. If there is a product that you would like that you don’t see on HowToPest.com, please call us at 877-708-1974 and we will do our best to get it for you.
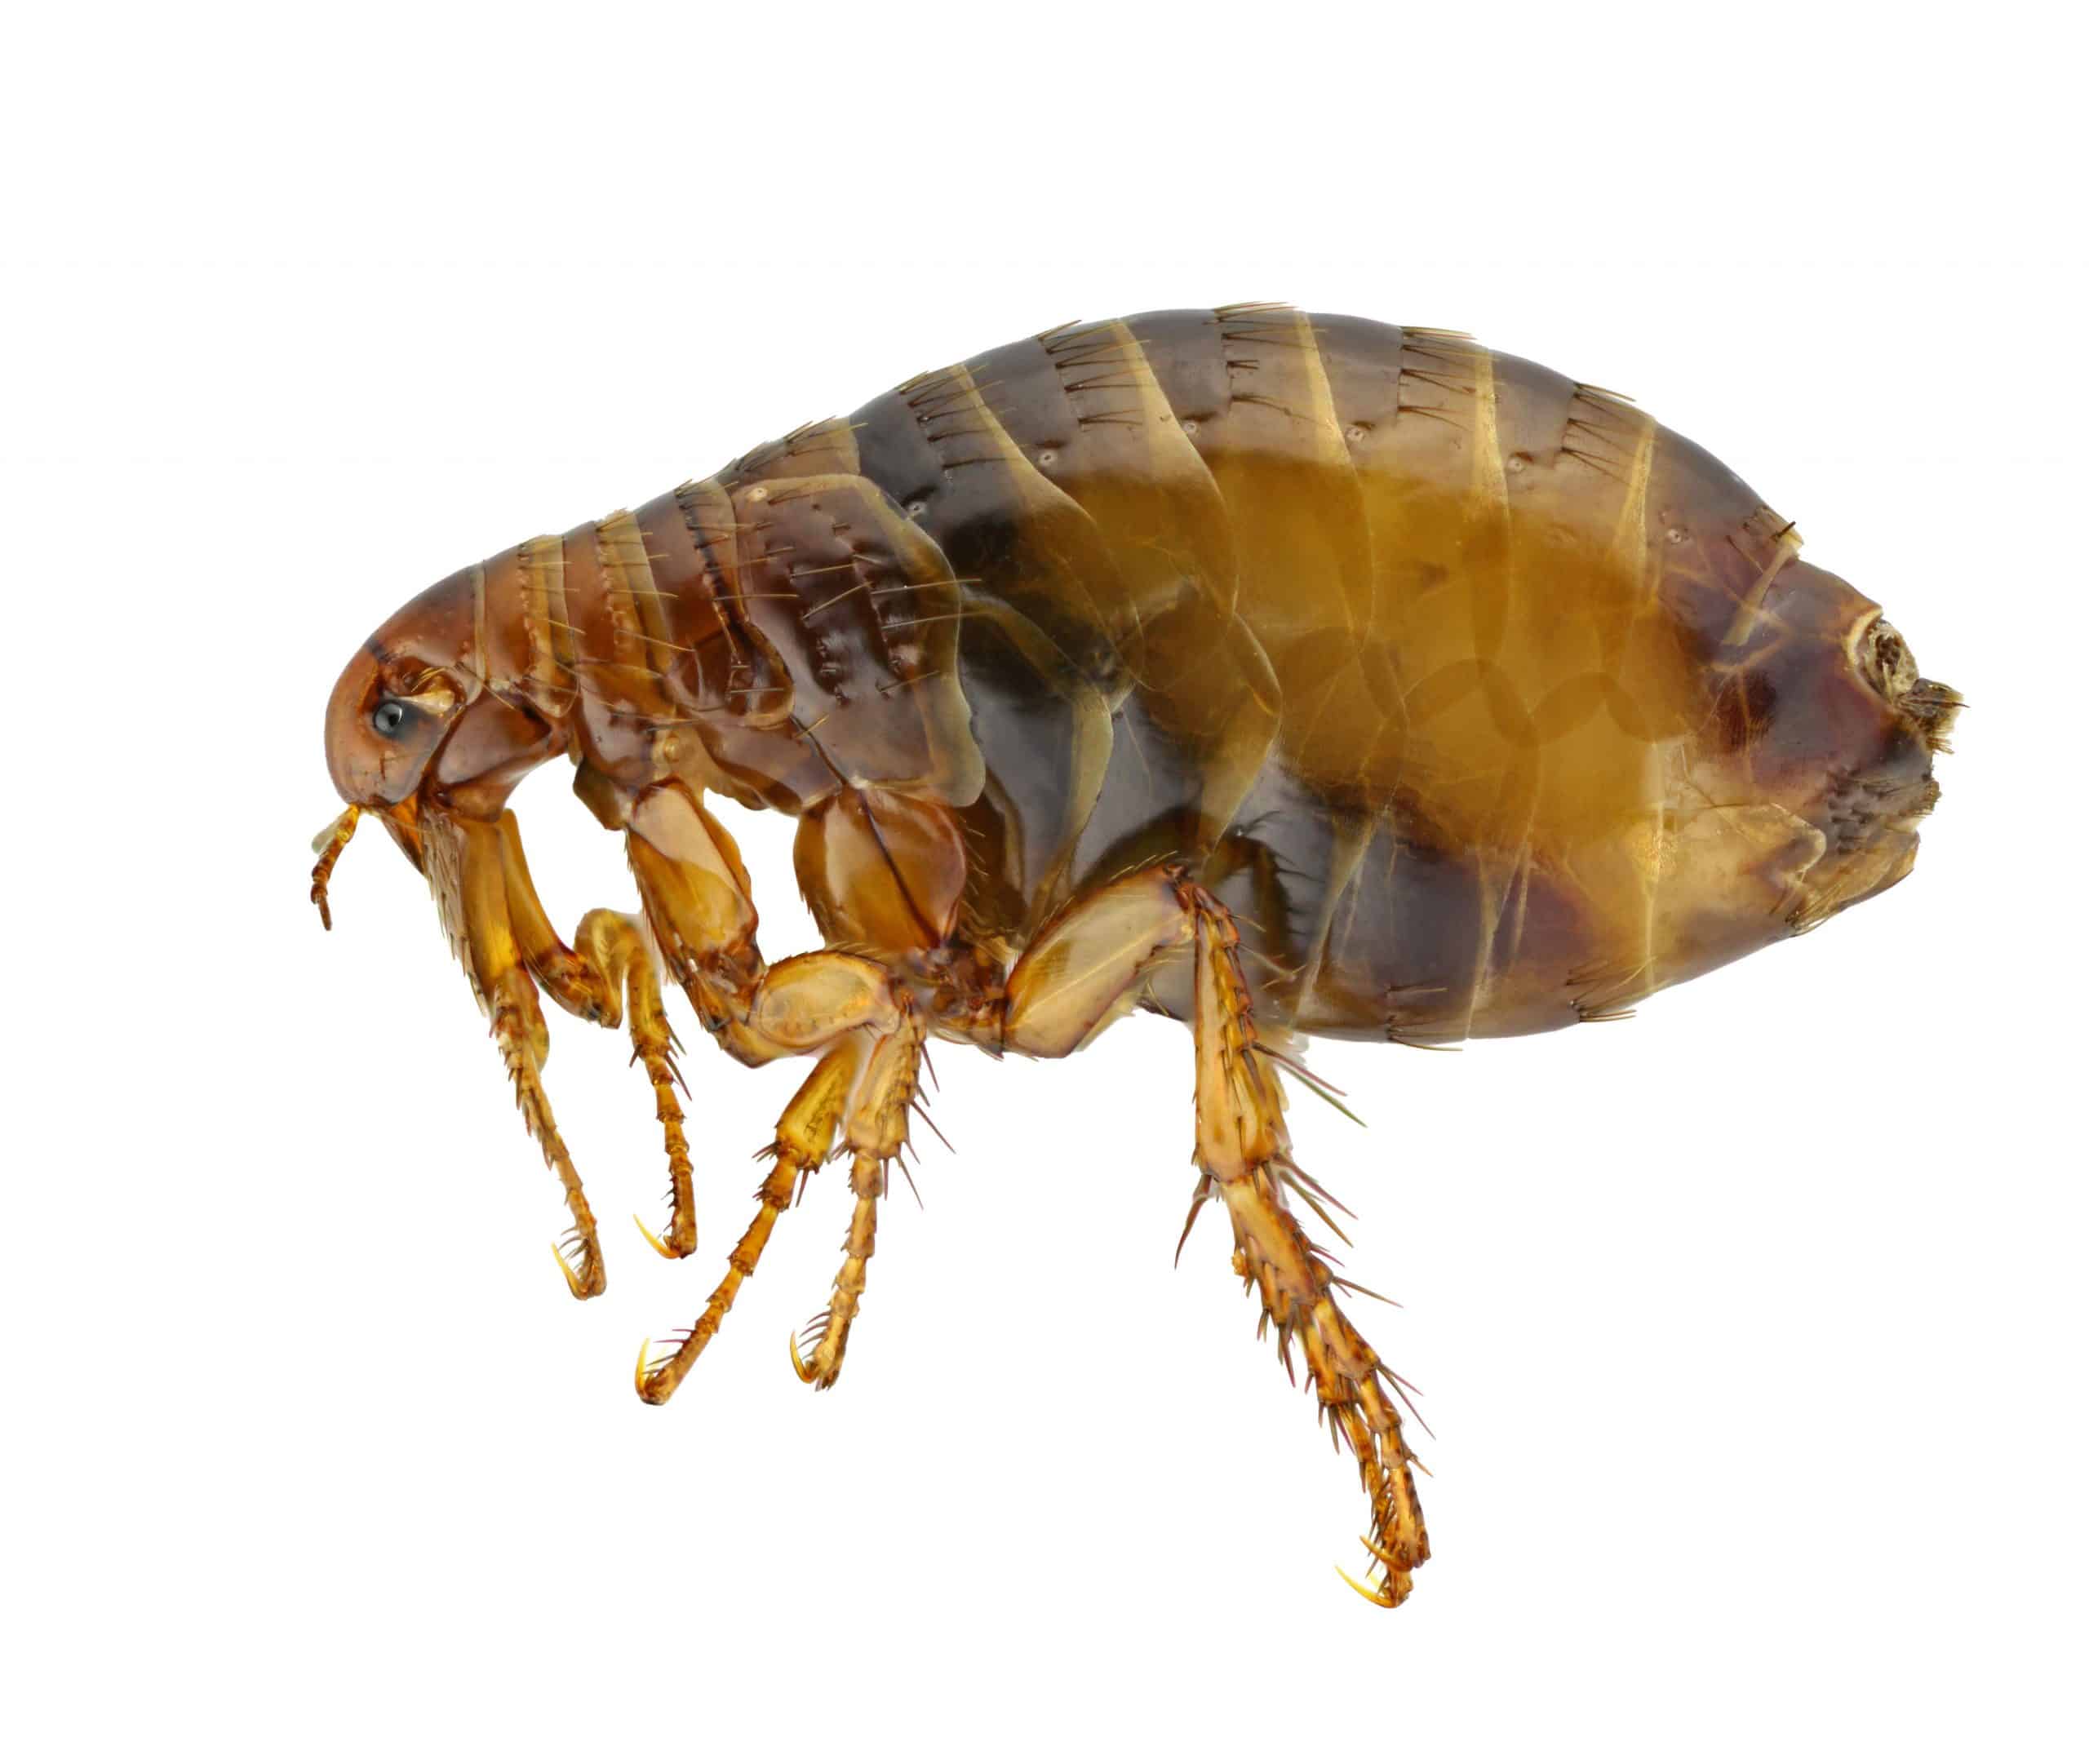
Most of the time when we get fleas and or ticks in our home, it is due to an infected pet that is traveling back and forth from the yard to the house. Being in the business of pest control for many, many years we have also found that flea infestations have come from less common avenues such as rodent infestations or dead/live wild animals in a crawl space. No matter how they got in, you definitely need to get rid of them fast!
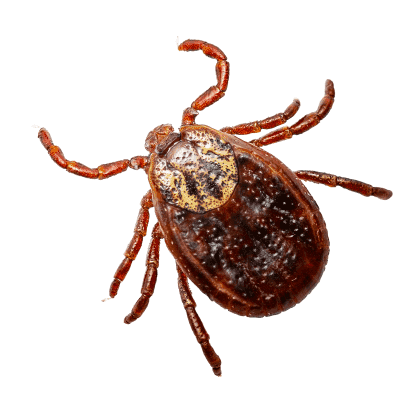
Having an outdoor flea or tick infestation will require a little more work, but don’t fret! We will walk you through it.
If a thorough flea or tick treatment has been performed properly, only one treatment may usually do the trick. But for larger flea or tick infestations a follow up treatment may be necessary. We would recommend doing your follow up treatment about 10 days after your initial flea/tick treatment. Remember to always follow label for re-treatment instructions.
If you need any further help please contact us and our Pest Pro’s would be happy to walk you through any flea or tick problem you may have!
We all know how rewarding a good-looking lawn can feel. There is something to be said about an honest day of yard work. But wait! What is that? An unsightly mound of dirt in the center of your freshly manicured yard! Your beautiful rose bushes are dying! Some burrowing creature has moved in, and they are certainly not welcome! HowToPest.com is here to save the day and your yard!
The first step to getting rid of gophers or moles is to determine whether it is just that, a gopher or a mole? The following is a gopher and mole identification guide that we have prepared for you, that will take the guesswork out of this question.
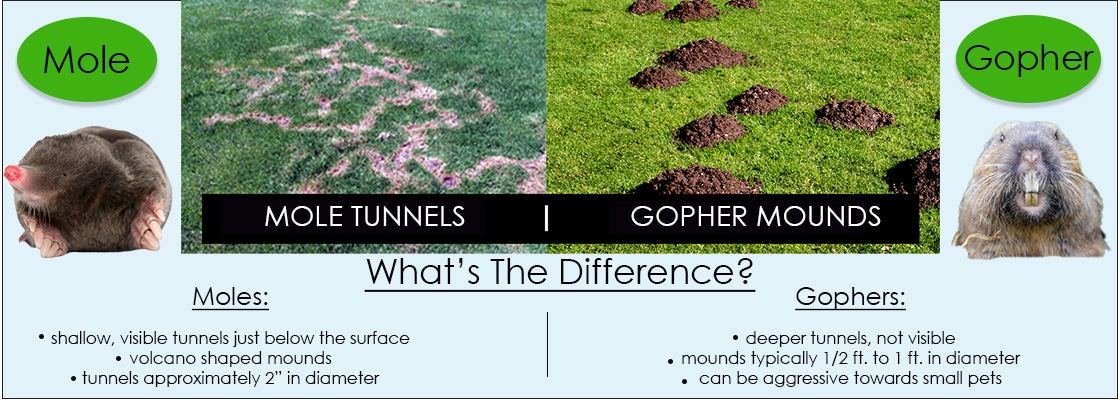
Note: Gophers only use their tunnels one or two times, so it is important to monitor for fresh, new mounds.
Note: Make sure you attach a long string to your traps, making them easy to find and remove.

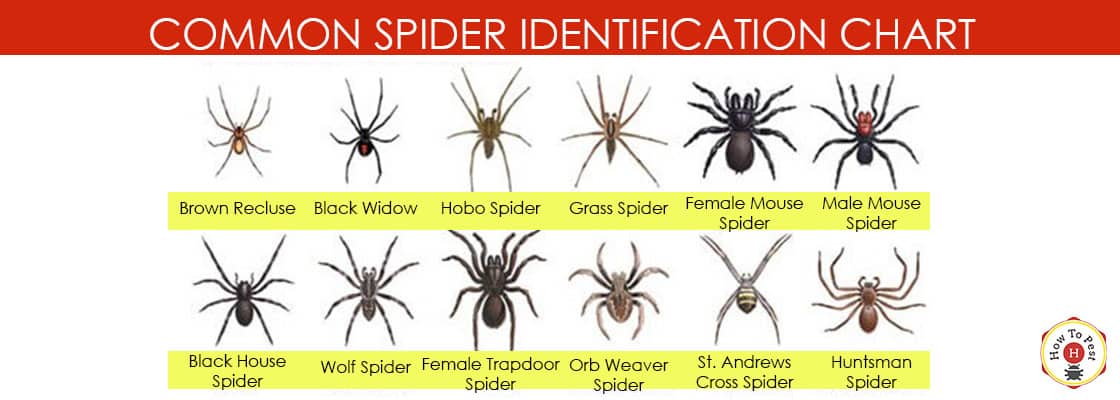
Spiders are everywhere and most spider species are quite beneficial, but that being said, when spiders are in your house all bets are off!
There is no “one-size fits all” answer of why you are getting spiders. There are over 30,000 different species of spiders so you are bound to get spiders at one time or another. Did you know that female spiders can lay up to 3,000 eggs at one time? Most spiders are harmless and when left alone are good to have around because they will eat 10% of their body weight in insects EVERY DAY! That is equivalent to a 200-pound person consuming 20 pounds of food each day!
Keeping spiders (or most pests for that matter) comes down to these steps:
Now let’s talk about the actual process of getting rid of spiders, starting with the outside of your home. Once you have done a thorough cleaning you will now want to apply a pesticide that is labeled for spiders. Take a look at all our spider control products here.
After mixing your insecticide concentrate in your hand-held sprayer, you will then want to spray the perimeter foundation of the structure approximately 2’ up and up to 10’ wide with a rate of about 2 feet per second, do not apply so much pesticide that it begins to drip or run-off. ALWAYS FOLLOW THE LABEL FOR SPECIFIC INSTRUCTIONS OF THE PESTICIDE THAT YOU ARE USING!
The following is a list of areas to treat for a thorough spider application:
Here is a list of insecticide concentrates that work great and are labeled for spiders:
Spraying for spiders inside you will want to focus on spraying:
Aerosols are great for the interior! They are fast acting and ready to use without any mixing. Here is a list of aerosol insecticides that work great and are labeled for spiders:
Now let’s talk about behind the scenes! A lot of people will neglect inside the walls. Using and insecticide dust in the walls and outlets is always a good practice.
Here is what you will need to dust inside the walls:
First, you will want to remove the cover plates of the outlets that you will be treating. Fill your Puffer Duster with any insecticide dust (such as Cimexa Dust, Delta Dust or Drione Dust) about ¼ to ½ full. Shake well and apply small light bursts (you want to let the dust float not clump) into the wall void areas then replace the cover plates. Small holes can be drilled into the drywall to insert the puffer duster and apply dust as well. The Wall Injector with Caps can be used and will allow you to reuse the previously drilled holes for future treatments and plug them when not in use.